Navigate
Products
Download
eShop
Upgrade
Overview
Training
Support

Navigate
Products
Download
eShop
Upgrade
About
Training
Support
Developed by BALARAD, s.r.o. company since 1997
First introduced in 1997, Embird has built a loyal user base within the machine embroidery community by emphasizing affordability, flexibility, and advanced manual control. Its users range from casual hobbyists and home embroiderers to small business owners and professional digitizers.
One of Embird's key advantages is its modular pricing model. Instead of requiring a large upfront investment, users can start with the basic Embird program for file management and simple editing, then add optional plug-in modules as their skills or business needs expand. This approach makes professional-level embroidery software more accessible to hobbyists who want to gradually move into digitizing.
Unlike many embroidery software programs that are designed for specific machine brands, Embird is completely machine-independent. It supports more than 70 embroidery file formats and is compatible with over 20 embroidery machine brands, making it a flexible solution for users working with different machines and design formats.
Embird offers a wide range of modules and tools that help streamline workflow and expand creative possibilities. Its ecosystem includes tools for editing, lettering, cross-stitch conversion, digitizing, resizing, and file management.
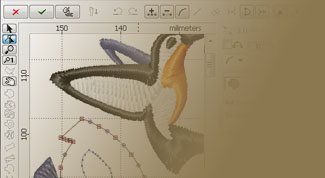
Although Embird includes automatic image-to-stitch conversion features, many experienced digitizers prefer it for its precise manual digitizing tools available in the Studio module. Professional embroiderers often favor manual digitizing because it typically produces smoother machine operation and cleaner stitch results compared to fully automated methods. Once learned, Embird's node editing and stitch control tools are considered both powerful and intuitive.
With nearly three decades on the market, Embird has developed a large international user community. Beginners benefit from the extensive availability of third-party tutorials, discussion forums, YouTube videos, and social media groups where users share advice and troubleshooting tips.